It is for those of us who can not afford the "Big Daddy Photoshop".
But, this baby of a program, packs a powerful punch!
This is a very simple tutorial on layers.
Layers will make your life complete.
Trust me on this one.
There is a lot of tweaking you can do to a picture without layers.
But you have so much more control using layers.
And I like control...when it comes to my pictures..that is! snicker
 Here is the picture I chose to edit.
Mainly because I was hungry, and L-boy is so edible in his dirty little elmo chair!
I might add that C-boy had this chair as a baby.
It's singing, "I've seen better days..."
Back on topic, ahem...
See over on the right.
I have the layers screen open.
The background copy is what you see on the large screen.
The blending mode is your best friend.
You will see why!
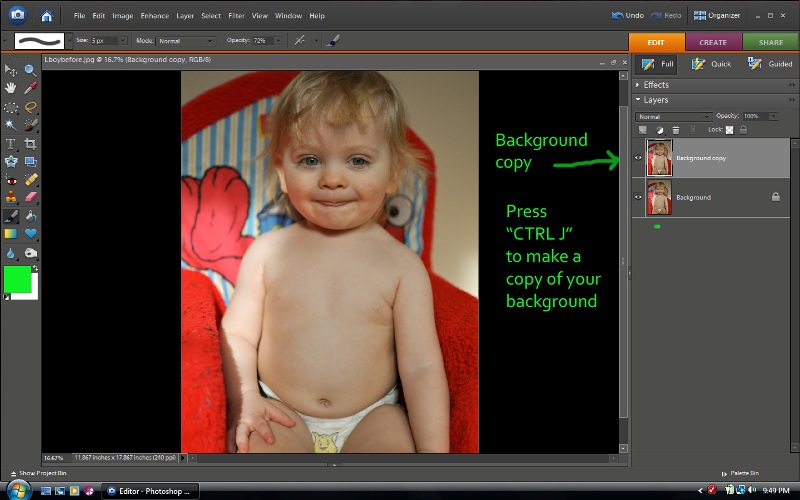 When you press "ctrl J" you will automatically make a duplicate copy of your background copy.
See how there is a second layer on top of the first.
Think of it like stacks of paper.
The one on the top is going to be the one that shows.
When we initially make the copy you will see no change.
However....enter "BLENDING MODE".....do you hear the angels singing??
Right now, the blending mode is set to "normal".
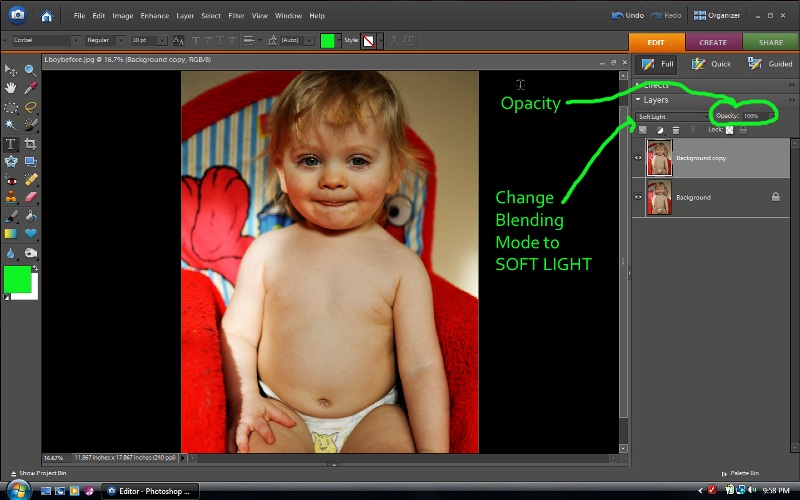
Click on that top layer in the layer's pallette. It will be light gray if it is highlighted. Now go up to the blending mode and click on that little arrow and a menu will drop down. Choose "soft light".
Yep...look how the depth and color of the picture just popped!!
All on it's own.
Now, if we are imagining the layers as a stack of paper and the top layer is totally opaque, then we won't see any of the papers underneath. However, if we want to see some of the paper's underneath..then we will have to adjust the opacity of our top layer.
I kept this at 100%.
I like it this way.
But I feel like it needs to be brightened up a bit.
There are many ways to do this.
But since we are talking layers and blending modes, I'll show you how to do it with another layer and blending mode change.
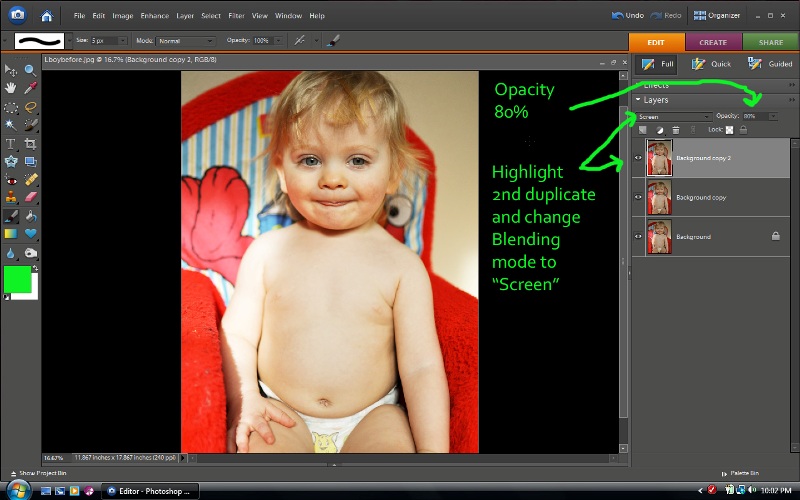 So all I did is press "ctrl J" one more time and created a new layer.
Click on that top layer and make sure it is highlighted. (light gray)
I changed the blending mode to "screen" and adjusted the opacity to 80%.
The "screen" blending mode gives it an instant lightening effect.
When you are finished, don't forget to go up to the top menu and choose layer,
Then choose "flatten" before you save.
Now, for those of you who have never tried this.
Please do so now!
You will be so tickled that you did.
There is no limit to what you can do.
Play with the blending modes just to see what they do.
You may have difficulty quitting once you've started!
Try "overlay" or "hard light", for even a poppier POP!
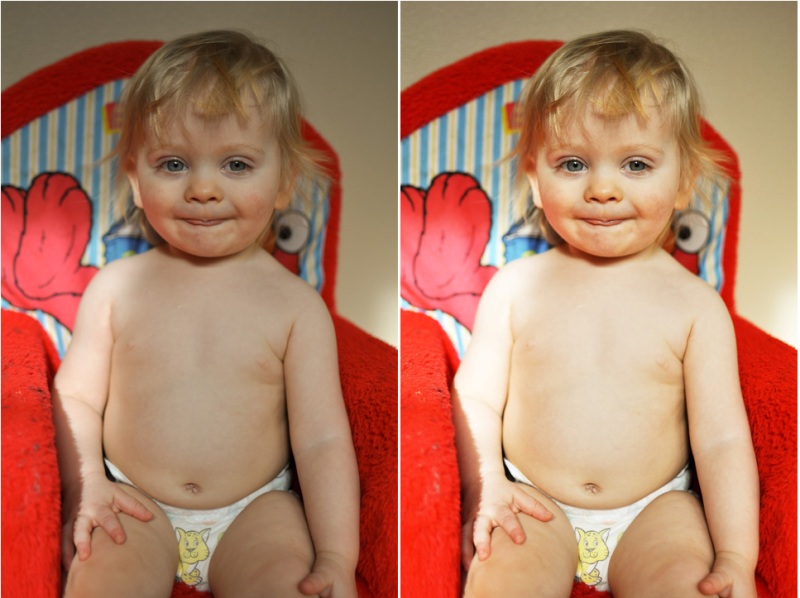
Here is the before and after.
Two layers!!
That's it!
And folks, we're just barely scratching the surface here.
Just.barely!
***********************************************************************************
I wanted to take a moment to thank Liz from A Belle, a bean, and a Chicago Dog
for gifting me with her Chicago Dog award. My blog will wear it proudly!

If you haven't read Liz's blog yet. I think you should hightail it over there. You'll be glad you did.
I hope you all have a meaningful Easter weekend.
He is risen!
**edited to add Mom n' Me Monday will return the week after this upcoming Monday. In other words, no Mom n' Me Monday this Monday. But please, if you have a picture..post it anyway.